met-my

ad

Tuesday, March 30, 2010

Crops in Pots!


Short on garden space? Or perhaps you’re garden-free and only have a balcony to cultivate your crops? Either way, growing veggies and herbs in containers is an easy and fun way to add unbelievable flavour to your food!

Before I get to the best crops for pots, I want to touch on the subject of containers because when it comes to picking a pot, size does matter. The bigger the pot, the less watering you’ll need to do. When it comes to watering containers, I’m a bit lazy and don’t want to be watering twice a day when the summer heat strikes, or even once a day for that matter! So, I look for a sizeable container that will be able to hold some moisture.

Even the material itself - wood, plastic, metal or clay – will help determine how much you will need to water. Light coloured plastic is very good at holding moisture, but darker coloured plastics can dry out quick. Wood is very insulating, especially when paired with a plastic liner that will protect the wood and help lock in moisture. Remember to use untreated wood for edible gardens!

Metal is ideal for a shaded container garden, but can overheat in the hot sun, so perhaps not the best choice for a container veggie plot. Clay is very natural and attractive, but plain, unglazed clay will wick away the moisture very quickly and is my least favourite choice for veggie containers for that reason. Herbs look great in clay or terra cotta though and a glazed clay window box or pot is ideal for a patio herb garden.

No matter what container you choose, remember that drainage is key! If your pots or window boxes don’t have drainage holes, make some if you can. If your pots are clay or terra cotta and lack drainage holes, use a plastic liner in the pot to help increase drainage. Roots that are constantly sitting in water will not grow well and your veggies will suffer.

When it comes to growing in containers, you must use potting soil. I’ve tried growing ornamentals, herbs and veggies with garden soil in the containers, and the results have been very disappointing. Potting soil, or organic potting soil is ideal – lightweight, retains moisture and drains well. If you have very large pots, fill the bottom half of the pot with chunks of styrofoam or syrofoam peanuts. This will help the pot stay lightweight, and save you some money on potting soil.

When it comes to the veggies themselves, pretty much any vegetable can be grown in a container – as long as you have plenty of sun! Therefore, grow what you love to eat! Heirloom tomatoes, cucumbers, pattypan zucchini, baby eggplant, sweet or spicy peppers, pole beans, salad greens, radishes, beets and so on!

One of my neighbours used to grow hot peppers in large black plastic containers on her paved driveway. The combination of the black plastic and the driveway moved her a few zones south and she was able to mature peppers that would not normally be cultivated in Nova Scotia.

When picking your varieties, look for bush or compact types – bush tomatoes, for example, are easier to control than the vining, indeterminate types that can grow 6-feet tall! There are also specific types of patio cucumbers and bush squash that will very well in containers. Underplant your tomatoes, peppers and eggplants with some cheerful nasturtiums, marigolds or calendula.

A patio pot of assorted gourmet lettuce also makes an interesting addition to a patio or deck. Be sure to include colourful varieties such as green and red leaf, baby romaine, oakleaf, butterhead and whatever else tempts your taste buds. Keep sowing fresh salad seed every 2 weeks to ensure a continuous harvest.

A window box makes an ideal miniature herb garden and can be filled with with basil, sage, parsley, rosemary, thyme and any other of your favourite herbs. Not only is it a great way to add fresh flavour to your cooking, but just rubbing your fingers over the foliage will release wonderful aromas to perfume your balcony or deck.

Keep in mind that you’ll need to feed your veggies often – I use a balanced organic liquid fertilizer every week at ½ strength to keep my potted crops happy. As mentioned above, proper watering is very important when growing in containers, and if sporadic, certain problems, such as Blossom End Rot, a tomato disorder that causes leathery black spots to grow on the bottom of tomatoes, can occur.

Sunday, March 28, 2010

A few seed shots..

I'm just getting ready for the last day of the Home Show, but thought I'd take a minute to post a few photos of my seedlings, as I've had a lot of questions about starting seeds this weekend..

I have 3 tiers of lights - homemade and inexpensive (as you can probably tell!) - and I generally start about 24 flats a year, growing a variety of crops.

The middle photo is a shot of my Spicy Globe basil seedlings - one of my favourite types of basil to grow! They're only a week old, but growing fast! I typically start about 100 basil plants (3 types) each spring, transplanting them in the garden once the risk of frost has passed.

The bottom photo is of artichoke 'Imperial Star', an artichoke that can be 'fooled' into producing in cold climates.. I have an earlier post on this, if anyone is interested - a fun garden project and fresh garden artichokes taste unbelievable!

Also, I currently have 15 types of tomatoes, 3 types of peppers, broccoli, giant cabbage (more on this later!), leeks, and several other odds and ends started under the gro-lights.

Happy Gardening!

Saturday, March 27, 2010

Upcoming Posts!

Wow! It's been a busy weekend so far - a whirlwind of lectures at the Spring Ideal Home Show in Halifax, but a lot of fun! I've had some kind comments and great questions from the attendees of the seminars that I'm putting on, as well as some good ideas for upcoming posts!

One of the ideas was about controlling deer! I've been asked several times over the course of the weekend about keeping deer away from precious veggies (as well as perennials). This is a topic that is near and deer (oops, sorry - dear) to my heart and I have plenty of good suggestions for preventing deer from munching your plants.. I will post on this in the next day or so.. so stay tuned!

Also, container gardening is extremely popular and many gardeners want to know what veggies and herbs they can plant in pots and window boxes for their decks and patios. Great question and another topic that I will tackle in the coming days!

Enjoy your weekend - it's cold here, but the sun is shining!

Happy Gardening!

Thursday, March 25, 2010

Great Gourds!


Although the kids love to play in the veggie garden – following the fuzzy bees, wandering down the pathways, picking purple beans, looking for hidden cucumbers – I think their favourite plants in the garden are the gourds. We grow about a dozen types of gourds each summer, yet only one is edible (snake gourd - see below). Gourds are grown simply for the fun factor!

Because garden space is at a premium – yes, even 2000 sq feet is not enough for me – I only plant gourds that we cannot buy locally. We start the seeds indoors in mid-April, transplanting the small seedlings into the garden when all risk of frost has passed in early June.

Gourds can be grown on the ground, where their long vines will sprawl in every direction, but I prefer to grow them up an A-frame trellis or the garden fence. Growing them up keeps their rampant growth under control, uses up less space and I love the look of the gourds dangling down through the trellis. Plus, it helps my snake gourds grow long and straight.

Here are a few of my favourites - and the kids think they’re pretty cool too!

Spinning Top Gourds (see photo)
Also called Tennessee Dancing gourds, these cute little gourds are produced on extremely vigorous vines. Last summer, I planted them at the edge of the garden and let the vines weave their way under the fence and into the nearby forest – some of the plants grew over 18 feet long! Each plant will produce up to 20 small spinning-top shaped gourds that make perfect toys for kids and immature grown-ups! From 5 plants, we harvested over 100 gourds that ranged in size from 1 ½-inches to 4-inches and spent hours spinning them all around the house.

Speckled Swan Gourds (the immature one in the photo is about 6 weeks from harvest)
Another favourite, the Speckled Swan gourd produces large fruits – often 2-feet long – that have a very distinctive shape. They truly look like a swan with a rounded body, long elegant neck and a small head with a beak. The skin on the fruits is deep green and heavily speckled with gold flecks. Each fall I bring a box of mixed homegrown gourds to the local schools to show the children. The Speckled Swan is always a hit and every child immediately gravitates towards this unique gourd. I grow them on the fence that surrounds the garden, but make sure you have a strong support, as these will be quite heavy by the end of the summer.

Snake Gourds
I grew these long skinny gourds a few years ago just for fun. When my mother-in-law was walking through the garden one day in late summer, she recognized this gourd as an edible type that she enjoyed in her homeland of Lebanon. So, after we harvested the 3-foot long gourds in the autumn and had showed them to the local students, I gave the fruits to her and she cooked them up – delicious! Snake gourds are a lot of fun for kids of all ages! If allowed to grow along the ground, the fruits will curl up like a coiled snake, but if grown on a trellis, they will mature long and straight. Each plant will give you at least 2 or 3 gourds of various sizes, but for the longest fruits, allow only one per plant. As with Speckled Swan gourds, the Snake gourd grows quite large and needs a solid support.

Happy Gardening!

Wednesday, March 24, 2010

Join me at the Spring Ideal Home Show!

It's that time of the year again! Take a deep breath.. can you smell the sweet scent of the freshly turned soil? Spring is finally here and gardeners are starting to think about the upcoming season. Well, to be perfectly honest, I never stop thinking about the garden! But, if you need any ideas and tips for creating a high-yield veggie patch or a spectacular container garden, I hope you'll come to the Spring Ideal Home Show this Friday, Saturday or Sunday to check out my upcoming lectures.

Check out this article that ran in the Halifax Herald this morning about my seminars (http://thechronicleherald.ca/CSHO/1173750.html).

I'll be in the Garden and Patio section throughout the weekend, but if you're hoping to catch one of my talks, here's the official schedule:

Friday - 4 pm Cutting Edge Containers and 7 pm Amazing Edibles: Simple Ideas for Small Organic Gardens
Saturday - 12:30 pm Amazing Edibles and 4 pm Cutting Edge Containers
Sunday - 1 pm Cutting Edge Containers

Hope to see you there!

Happy Gardening!

Tuesday, March 23, 2010

The Pick of the Crop!

It's raining today - finally! I've been waiting for rain for weeks and if we didn't get some moisture today, I was going to have to get out the hose and water the new veggie seed that I planted myself! (arugula, mache, Black Seeded Simpson lettuce, etc). Lucky for me, the rain has come and I can be lazy..

Lecture season seemed to start extra early this year once again the hottest topic for 2010 is organic kitchen gardening. More and more people are discovering the pleasure (and flavour!) of growing their own! Luckily, as you can probably tell from the name of this blog, it is my favourite gardening subject and I thought I'd take a few minutes to write about the best part – figuring out what to plant!

What should you grow? Grow what you love to eat. Grow what you can’t buy locally (heirlooms, unusual vegetables). Grow gourmet vegetables and herbs that are usually quite expensive to buy, but simple to grow (leeks, arugula, mesclun mix).

Here’s a list of some of my favourite crops to cultivate:

Leeks
Although I had never cooked with leeks before, I decided to plant them a few years ago for the first time - mainly because they looked so beautiful in the garden with their tall, architectural foliage. I started the seeds indoors in mid-March and transplanted them to the garden in early May. You can also buy transplants from a local nursery. As I planted each sad-looking, spindly seedling, I didn't have much hope. Yet, within a month, they were beginning to thicken up nicely and by early autumn, the plants were gorgeous - tall and spiky with long white stems. We harvested them all autumn, and when winter finally threatened, I tossed a thick blanket of shredded leaves on top on the remaining leeks and covered them with a row cover to keep the leaves from blowing away. Then, whenever I craved leek soup (Check out my early posts for the recipe!), I just wandered up to the garden, reached under the mulch and pulled a few sweet leeks. Mmm!

Arugula
Extremely pricey at the grocery store, arugula is actually incredibly simple to grow. It thrives in the cool weather of spring and fall, producing an abundance of peppery leaves in as little as 30 days - I guess that's why it's also called rocket! Plant the seeds directly in the garden as soon as you can work the soil, sowing more seed every two weeks for a continual supply. We serve arugula the Argentine way - drizzle a bowl of leaves with olive oil, a squeeze of fresh lemon juice and a sprinkle of salt for a simple, but sensational gourmet salad.

‘Emerite’ Pole Beans
If you can only grow one bean in the garden, let ‘Emerite’ be your choice. A true filet bean, this French-import bears generous clusters of 20-centimeter long, melting tender green beans. The pretty vines will grow about three-meters tall and will happily scramble up netting, string, or a teepee of bamboo poles. They bear their heavy harvest over a very long period of time and take up much less space than traditional bush beans.

Purple Podded Pole Beans
A treasured heirloom for almost a hundred years, this 2-½ meter tall vine offers an endless supply of meaty, stringless deep purple beans that grow up to 20-centimeters long. The foliage is also purple tinged and extremely attractive, making it an ideal edible for ornamental gardens. My children call them magic beans, as once they are blanched in boiling water, they turn bright green in colour.

Cucumber ‘Lemon’
I’ve been touting the merits of this heirloom cuke for years now and have no intention of stopping until every vegetable patch in North America boasts a few of these productive plants. Lemon cucumbers are super achievers in the garden, with their three-meter vines branching off in every direction and producing up to 20 fruits per plant! The cucumbers resemble flattened lemons with soft greenish-yellow skin and extremely crispy flesh. Grow them vertically on a trellis to save space.

Cherry Tomato ‘Sungold’
‘Sungold’ is garden candy with its irresistible sweet flavour. None of the 2 to 3 cm wide fruits actually make it into our house, as they are all eaten in the garden directly off the vines. The plants are indeterminate, often growing over 2 meters tall and produce long clusters of the golden fruits. (For more info on Sungold, see my earlier posts)

Other Jabbour family favourites include ‘Costoluto’ Tomatoes, ‘Black Krim’ Tomatoes, ‘Garden Oasis’ Cucumbers, Fingerling Potatoes, ‘Bright Lights’ Swiss Chard, ‘Atomic Red’ Carrots, 'Napoli' Carrots, Pattypan Zucchini and ‘Super Sugar Snap’ Peas.

Happy Gardening!

Monday, March 22, 2010

Upcoming Interview with Barbara Pleasant!

Spring is finally here and the start of The Weekend Gardener is just around the corner! I've been busy booking guests for this season on the show and I'm thrilled to say that Barbara Pleasant, the author of my favourite new gardening book - Starter Vegetable Gardens - is going to join me to chat about her no-fail plans for small organic gardens. I'll announce the date a bit closer to that particular show, but it will be in late May.

Barbara is such a fun guest - and so knowledgeable! She joined me on the air a few years ago when her last book, The Complete Compost Gardening Guide, was released, so I'm really looking forward to chatting with her again. One of the reasons that I love this new book is because the garden plans detailed inside are so simple and unique. They're ideal for a novice veggie gardener or someone like me (crazy obsessive!).

I am especially enthusiastic about her 'Easy-Care Bag Garden', a design that uses bagged garden soil to create a simple, no till garden. If placed on an existing lawn, these garden bags will help the turf underneath break down over the course of the season, and by the time the last veggie is harvested in autumn and the bags are removed, you can easily fluff the soil, add some compost and you're ready to plant the next spring - no heavy digging or sod removing necessary!

Many of the designs in the book (there are 24!) offer a 3 year plan, so that you expand your garden as you expand your experience, without feeling overwhelmed by maintenance. The design illustrations are also very easy to understand, not to mention attractive.

Stay tuned for more details about my upcoming interview with Barbara - plus, I'll have several copies of her book to give away to listeners!

Happy Gardening!

Saturday, March 20, 2010

Coming to a Store Near You!

Hot off the presses, the 2nd issue of Gardens East will be in stores over the next few days! The cover shot is of a local Halifax garden that I had the privilege to visit late last fall - and what a garden! The owners are extremely creative - both indoors and out - and have managed to create a peaceful retreat in the middle of the city.

Located a stone’s throw from Dalhousie University, this garden is a true testament to what can be done in a small space. The property is long and narrow, measuring approximately 33 x 100-feet with the house occupying a large portion of the space. Yet, tucked away in the backyard is an urban oasis filled with a carefully chosen collection of small trees, hardy shrubs and colourful perennials.

I hope you enjoy the article, as much as I enjoyed visiting the garden!

By the way, Happy Spring!

Friday, March 19, 2010

Earliest Seeding Ever!

I just came inside from the garden - another glorious day outside! It may be the last day of winter, but I just planted some arugula and 'Black Seeded Simpson' lettuce seed - my earliest unprotected planting ever! I'm not sure how well they'll do with no covers, cloches or coldframes, but it will be fun to track their progress. Of course, I'll keep you updated as well! The photo is one of my spring plantings of 'Black Seeded Simpson' lettuce from 2009. It's a great cool weather crop - fast, reliable and delicious.

Arugula is another lover of cool temperatures and the baby leaves are usually ready to harvest around 30 to 40 days after seeding! I guess that's why they also call it rocket - for its ability to shoot out of the ground!

Another early spring crop (that I hope to plant tomorrow!) is mache, also known as corn salad. It produces small rosettes of spoon-shaped leaves that have a mild nutty taste. When I harvest them, I pick the entire plant, using them in salads (tossed with a splash of olive oil, fresh squeezed lemon juice and a sprinkle of salt) or as a bedding for fish and chicken dishes. If you want more info on mache and its extreme cold tolerance, check out my earlier posts, which also have some photos attached.

Happy Gardening!

Thursday, March 18, 2010

Slug Eggs!

As I mentioned in a post last week, if slugs are an annual problem in your garden, if you look now, you will probably find some clumps of slug eggs hidden under rocks, logs and other garden debris.

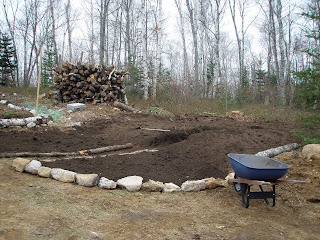
We've been working in the veggie garden all day, moving rocks, digging an area for the new cold frames and putting down a new border of logs. As I lifted some of the old, half-decomposed logs away, I noticed large clumps of slug eggs - so of course, I raced down to the house for my camera and snapped a few photos! So, if you notice any of these crystal-ball shaped eggs in your garden as you're working - get rid of them! Even giving your soil a raking will help expose any slug eggs to hungry birds.. Every egg you can eliminate now, will save you much frustration this spring and summer!

Happy Gardening!

A Sign of Spring!


Every year I tell myself that I need to start making more ornamental gardens.. and then every year, I devote all my time to the kitchen garden, while the rest of the landscape remains ignored. Well, no more! This is the year that we're finally going to finally start adding some shrub and perennial beds. I have a rather pretty (if I do say so myself!) perennial border at the back of our house, but it's time to take that a step further and do some work to the back terrace, the back lawn and the front gardens.

We visited the nearby home of Duff and Donna yesterday, who also happen to have their garden featured in the current (March) issue of Gardens East. Even in March their property is spectacular and the visit was a wonderful source of inspiration for me. I am particularly fond of their witch hazel shrubs and the photos with this post are of 'Arnold's Promise' and 'Jelena' - two incredible spring beauties! Donna says that they've been in bloom for about a month - since late Feb!

They've also put in a soon-to-be-planted potager (as you can see from the first photo) that Duff built last fall. I'll follow the progress of their garden, and post updates as the season progresses!

Happy Gardening!

Monday, March 15, 2010

Happy March 15th

Happy March 15th! That may seem a strange greeting, but for me, March 15th is the traditional day for sowing a variety of seeds - from tomatoes to peppers to basil to leeks! I'll be a day off this year, as I'm down in North Adams, MA meeting with my publisher, but when I get home tomorrow, I'll be pulling out the seed trays, potting soil and shoeboxes of seed! (yes, I said shoeboxes - I need 4 now to keep all my seed tidy. I might be seed hoarder!)

I also need to get my grow-lights ready. I have 3 tiers of them set up in my basement and I'm able to grow about 12 flats of seeds at any one time. As the season nears, some of the flats will move outside for hardening off, and other seeds will be started. Most gardeners turn their grow lights off in early June, once the tomatoes are in the garden. Not me! Being the obsessive gardener that I am, I keep planting more seed indoors - broccoli, kale, cauliflower, cabbage and so on, so that I can transplant them into the garden in early to mid-July for a fall harvest.

Anyway, I hope that any gardeners who haven't tried growing their own veggies (or flower or herbs!) from seed will give it a go this spring. It's not too late! It's also very rewarding growing your own, plus, you get to pick from varieties that aren't usually available if you buy transplants from your local shop. Most greenhouses offer just a handful of tomato seedlings, but if you start your own, you can pick from hundreds! Just pop into your local garden centre and pick up some seed (see older posts for seed starting tips as well as some of my variety recommendations!). Good luck and..

Happy Gardening!

Saturday, March 13, 2010

Countdown to Spring!


Spring may still be a whole week away, but it has certainly started to feel like spring in recent days. I've been taking advantage of the warm spell to start puttering in the garden. Last week, the soil was still quite frozen, with my garden fork hardly making a dent. Yesterday, I was able to sink it about a foot deep into the rich dark earth. What a great feeling!

Last fall for our anniversary, my hubby ordered a truckload of 2 year aged manure (perhaps the most romantic gift ever!), but we weren't able to spread it all before the first snow came and stayed. So, now that the temperatures have been mild, the manure pile has also started to thaw and i was able to move several wheelbarrows onto the garden beds yesterday.

If you didn't get around to liming your veggie and flower gardens or lawn last fall, this is a great time to do it. I spread a bag over 1/2 of the garden a few days ago and then bought 3 more bags of powdered lime yesterday. It's a bit more messy than the pelletized lime, but I find that it is absorbed faster. Since lime takes a few months to alter the soil pH, it is best to lime in autumn, but better late than never!

As I cleaned up debris from around the garden, I happened to move a few boards. Underneath I noticed small clumps of tiny orbs that resembled crystal balls. Slug eggs! Slugs have been a major pest in my gardens over the past few years, and finding a cache of their eggs before the season starts is an early treat! Today, I'll pop up to look under nearby rocks, logs or the old watering can that was forgotten in last fall's garden clean up. You never know where you'll find more of the deceivingly pretty eggs! I know I have a photo somewhere, but for now, I've posted a few colourful spring flowering bulbs from last year's garden for you to enjoy!

Happy Gardening!


Thursday, March 11, 2010

The Weekend Gardener is Gearing Up for Season 4!

Yep, it's official, The Weekend Gardener radio show is getting ready to gear up for season 4! Join me from 11 am to 1 pm (Atlantic Time) on News 95.7 FM, News 89.9 FM, News 91.9 FM or listen online at www.news957.com.

As always, each show will be packed with timely tips, interesting guests (local experts, passionate gardeners and international authors!) and all that's new and fun in the world of gardening. Did I forget to mention the giveaways?! Well, maybe you better tune in to get the details on our weekly giveaways!

Of course, we'll also be taking your phone calls, questions, comments and ideas, so please keep them coming!

The fun starts on Sunday, May 23rd - I hope to chat with you then!

Happy Gardening!

Secrets of the Budget Gardener!


As someone who spends over $100 on seeds each year, I know just how easy it is to break the bank when buying gardening supplies. Therefore, it just makes sense to garden on a budget when expanding your existing plantings or starting a new garden from scratch.

There are so many easy ways to cut corners and who knows, you might even learn a little something, like how to start seeds indoors or propagate plants from cuttings.

Early spring is a great time to plan and organize your goals. By deciding what changes and additions you wish to make and how much you can afford to invest in your landscape in advance, you’ll be more apt to stick to a budget. There's also nothing wrong with creating a plan - perhaps a 2, 3 or 5 year plan (I have so many ideas, that mine has become a 50 year plan!)

This is also the perfect time to start thinking about starting seeds indoors. Many types of perennials, annuals, veggies and herbs can be started indoors in a sunny windowsill or under grow lights. Growing your own veggie transplants also means that you get to choose from the huge variety of seeds available from seed catalogues. Generally when you go to a garden centre to buy your tomato seedlings, you only have a handful of varieties to pick from. Growing your own allows you to try heirloom and unique varieties not found locally (Sungold tomatoes, Cherokee Purple tomatoes, Black Krim tomatoes, Big Rainbow tomatoes, Lemon cukes, etc.) For more detailed info on starting seeds, please refer to my earlier post on Seeds vs Transplants.

In late spring, increase your supply of hardy perennials by hosting a plant swap or organizing a plant sale. Many perennials, including hosta, daylilies, lily of the valley, perennial geraniums, iris and bee balm propagate readily from division and may be dug up and split to share or sell. Invite family, friends and neighbours to dig up and divide some of their own overgrown perennials. Also ask everyone to bring along any packets of surplus seed to trade and share.

Healthy soil is the key to a successful garden and a yearly application of compost can take your garden from so-so to sensational! Here in Halifax, the municipality recycles all of our food waste with a green bin system. But there's no need to give away your vegetable peelings, kitchen scraps and leaves when you can use them to make free food for your garden.

An inexpensive composter can be made with chicken wire and some strong wooden stakes or create a free-formed pile, turning occasionally to allow air to reach the center. A garden can never have too much compost so don’t fork over big bucks on pre-bagged organic matter when you can easily make it yourself.

Do you need to aerate your lawn this spring? Sharing the cost of rental equipment like a rototiller, lawn dethatcher or aerator can save some serious bucks too. Talk to friends and neighbours before you rent to see if anyone is willing to split the expense. Finally, buy in bulk. If you need a generous amount of mulch or topsoil, consider investing in a truckload – the cost per square yard will be significantly less than buying an equal amount of pre-bagged material.

Happy Gardening!

Tuesday, March 9, 2010

A Water Cloche!

Years ago, when I first started out in the gardening industry, I worked at a garden centre that sold packages of these water cloches (usually sold under the names of 'Wall-of-Water' or 'Kozy Koats'). The premise is simple - just unfold the cloche, fill the 'ribs' with water and place over a tomato, pepper or other tender plant. The package said that you will be enjoying ripe tomatoes 4 to 6 weeks before your neighbours!

Here's the theory on why these cloches should work - the water in the 'ribs' absorbs heat during the day, and then slowly releases it at the night, protecting the plant from frost and cold weather. I've read that a water cloche will actually protect a plant down to 12 degrees F! That's -11 C for my fellow Canucks! Pretty impressive, eh?

So of course, I had to try it! But, I should first admit that I was a bit skeptical. Well, after several seasons of testing these temporary structures, I have to say that although they don't necessarily live up to the hype of tomatoes 6 weeks earlier than those without protection, they are still a very useful contraption.

I put them in the garden around April 1st and fill them with water (a technique that takes a bit of practice - although the kids have a lot of fun getting wet!). I leave them in place about 10 to 14 days to allow the soil under the cloche to warm up. Then, I lift it up (it helps to have a partner here!), put it to the side and plant my veggie - artichoke, tomato, pepper, eggplant - you get the picture. Then, I water and move the cloche back on top of the plant. Planting any of these tender veggies around April 15th in Nova Scotia is a full 6+ weeks earlier than the typical planting date of June 1st - not bad!

A tip - don't fill the cloche all the way to the top - leave about 5 or 6 inches unfilled.. this will allow the top to close over a bit, creating a mini-greenhouse.

According to the manufacturers of these various products, you can leave them in place all season long, but I take them off once the risk of frost has passed in the first week of June. By this time, my tomato plants are close to the top of the cloche, if not poking through the opening. Get a helper to give you a hand lifting off the cloche - you don't want to damage the plant after all your hard work!

Last year, I grew several Cherokee Purple Tomatoes under these types of cloches and I enjoyed sun-ripened tomatoes about 2 weeks sooner than the same variety that didn't have the early season protection.

The cost? You'll typically find these water cloches in packs of 3 for about $14 and they'll last about 3 years if you don't poke any holes in them accidentally!

Happy Gardening!


Monday, March 8, 2010

Designing an Edible Paradise


Before you break ground on a new garden, take a little time to think about how you would like to layout the beds. Good planning will enable you to think sensibly about how much space and time you can devote to your garden and what types of vegetables you should grow.

Start by asking a few questions - How many people will be eating from the garden? How much time can we devote to the garden? What do we like to eat? The answers to these questions will give you an idea of how large to make your garden and what to grow.

The most important piece of advice to remember, especially for novice gardeners is to start small. A 4 by 8-foot or 10 by 18-foot garden is large enough for an initial kitchen garden. In a 10 x 18-foot patch, you can divide the space into 4 manageable 4x8-foot beds, with 2-foot pathways. Once you’re spent an entire season planting, growing and harvesting, you’ll know if you want a larger space.

I do recommend sketching out a garden design before you ever put shovel to dirt. It allows you to play with the size and shape of the garden and helps show what you can realistically grow in that sized space. Rectangles and squares are the easiest bed shapes to work with, but I’ve also seen kitchen gardens arranged in spirals, circles and triangular beds. It’s your garden, so have fun with it!

Vegetables are usually grown in rows or beds. I prefer raised beds as it allows me to grow the plants closer together, which offers a larger harvest from a smaller space and helps shade out any weeds. Raised beds also warm up quicker in spring, are better drained and create a very attractive, as well as productive space.

Make your beds no larger than 4-feet across so that you can easily access the center from either side without actually walking on the garden soil. I edge my beds in a variety of plants to get the most out of my space. Spicy Globe Basil or baby lettuces make a pretty and flavourful edge, but dwarf flowers such as nasturtiums, marigolds, sweet alyssum or calendula can also be used. They add colour and attract beneficial and pollinating insects.

When picking the ideal spot for your new kitchen garden look for a site that receives at least six hours of full sun. In a partially shaded spot you can still grow greens such as spinach, Swiss chard and arugula, but any veggie that needs to produce fruits (tomatoes, cukes, peppers) will require about 6 to 8 hours of sun for optimum growth. A convenient water source and compost pile is also nice. Our gardens are only about 40 feet from the back door, so when I'm cooking supper and realize that I need a handful of basil, it only takes me a minute to get what I need (unless I get distracted by a wandering bee or clusters of just-ripe tomatoes!)

Finally, before you actually start to dig, take a quick walk around your intended site. You can even sprinkle flour or powered lime on the ground in the design of the garden to ensure that you are happy with the size and shape. It's much easier to make changes before, rather than after!

Happy Gardening!

Sunday, March 7, 2010

Spicy Globe Basil

Fresh basil is truly the scent of summer! I love to run my fingers over the plants as I stroll through the garden, or pick a sprig just to inhale the intense aroma.

Although I grow about six types of basil at any one time (a topic for a future post!), my favourite is Spicy Globe Basil. I first discovered it about 10 years ago at a local greenhouse, and it instantly became one of the yearly 'must-have's' in our garden.

The plant itself is very compact. In fact, with its rounded shape and small leaves (they're only about 1/2 to 3/4-inch long), it looks like a miniature boxwood shrub. Because of its diminutive size (about 10 by 10-inches), Spicy Globe Basil makes a great potted plant for the patio or windowsill, but I also like to use it as an edging for garden beds. It adds a touch of formality to the organized chaos of our kitchen garden. You can also tuck a few plants amongst your perennials if you're short on space!

Typically, Spicy Globe Basil is very slow to bolt (go to flower), but when flowers do develop in late summer, just trim them off as they appear so that quality of the leaves doesn't begin to diminish.

If you love pairing tomatoes and fresh basil, you'll find that Spicy Globe Basil is the perfect compliment to sun-ripened tomatoes. I also use it for pesto and it is the main ingredient in my favourite pasta - chop generous handfuls of basil, tossing it in a large pan with some olive oil, garlic, pine nuts and a few chilies. Sautee for a few minutes and then add some cooked spaghetti and copious amounts of fresh grated parmesan.. sooooo good!

Basil is a tender annual and in Northern climates needs to be started indoors or purchased as transplants. Grow it in a spot with plenty of sunshine and well-drained soil. Slugs may be an annoying garden pest, but they do have good taste. They tend to attack my basil before anything else, so keep a look out for these slimy mollusks if they tend to be a problem in your area.

Happy Gardening!


Friday, March 5, 2010

Avoiding Failure!

Yikes.. I was just reading a new survey from the Garden Writers Association, an organization I joined over a decade ago. Although almost 8 million new veggie gardeners took up the challenge of growing some of their own food last year in the US, over 70,000 of them gave up and won't be trying again this season. Why not? There are 3 main reasons why new gardeners give up:
  1. Starting too big - When it comes to growing veggies, it's best to start small until you get the hang of it. Even a 4 x 8-foot space will offer a decent harvest and some valuable experience. If your garden turns into a chore, something is wrong.
  2. Planting too much - Pick just a handful of crops (that means about 5!) your first season, concentrating on family favourites (beans, peas, tomatoes) and easy-to-grow types (lettuce, other salad greens, carrots, radishes, etc.).
  3. Avoiding maintenance - A small veggie garden really doesn't need much maintenance (10 minutes a week for weeding, a quick weekly peek for pests, an occasional watering if there has been no rain and a few minutes to sow more seed as crops mature) These garden 'chores' should be considered part of the experience as a whole.. Although weeds are rarely a problem in our garden, I find the time spent pulling weeds is quite rejuvenating - I'm accomplishing something, getting fresh air and enjoying the beauty of the garden - it's all in the mindset! (I'm sorry that I sound like a life coach or new age cheerleader!)
Anyway, the point is, before breaking ground on a brand new veggie garden, put some thought into it.. get a good book (again, I'm in LOVE with Barbara Pleasant's new book - see my post from last week), sketch out a plan and have fun!

Happy Gardening!

Year of the Squash!


The National Garden Bureau (in the US) has just announced that 2010 is the year of the squash! Are you excited yet? Five years ago, I would have thought that squash was a rather uninspired choice for such a prestigious title, yet now that I've been introduced to the wide variety of squash available to gardeners, I'm a changed woman!

Squash is an ancient North American native that is one of the oldest sources of food grown in this part of the world (along with corn). Today, the squash family is one of the most diverse, boasting a large range of sizes, shapes and colours - including orange, pink, gold, soft green, blue gray and deep green. It's also good for you, containing essential minerals and vitamins!

Squash are a member of the Cucurbitacea family, which includes three species considered squash - C. maxima, C.moschata and C. pepo. Generally, summer squash are from C. pepo, but winter squash can be from any of the three species.

In our gardens, I tend to grow mainly summer squash. Why? Because they're quick to grow, typically take up less space and produce very heavily! I think we all know how generous summer squash can be in their harvests! Every year is a bumper crop and although a family of four really only needs 1 or 2 plants, I usually grow a dozen. What can I say, there are so many beautiful types of summer squash, that's it's hard to pick just one!

Here are a few of our favourites:

Pattypan Squash - I grow about four different types of pattypan every summer, choosing cultivars like 'Sunburst', 'Starburst', 'Peter Pan', and 'Moonbeam' (see photo of 'Moonbeam' above provided by the National Garden Bureau). These pretty zucchini are best picked when they are about 2 to 4 inches in diameter and can be roasted, bbq'd or sauteed whole. Many of the cultivars offer plants with a 'bush' habit, as opposed to sprawling vines, making them a good choice for a small garden. (By the way, even the kids like these flying saucer-shaped zucchini!)

Zucchini - Zucchini are a garden staple in North America. Not only are they easy to grow, but the plants are also extremely prolific! Admit it, haven't you ever left some of your excess crop on your neighbour's doorstep? They also seem to triple in size overnight, and that small zucchini that you left in the garden 3 days ago is now a baseball bat-sized monster! We try to pick our zucchini small (8-inches long or less) - not that I don't occasionally miss one hiding under the leaves, which ends up grated for zucchini cake, muffins and loaves.
  • Magda - My hubby is Lebanese and this is a Mid East-type squash with soft green skin and blocky, tapered fruits. They have a mild nutty flavour and are ideal for stuffing, stir-frying or pickling. I usually grow about 6 plants in order to keep my mother-in-law in the tender fruits all summer long.
  • Costata Romanesco - Say the name out loud.. doesn't it sound like the name of an Italian movie star? Well, it may not be a movie star, but it is a culinary star with its long, ribbed fruits in alternating shades of gray-green and pale green. The yield is less than with other types of zucchini (which may be a good thing), but the flavour is unbeatable! It also produces a good supply of male flowers for stuffing or appetizers.
  • Floridor - This is a rather unique zucchini. It resembles 'Eight-ball', which is a small, round deep green zucchini, yet, 'Floridor' has sunny gold fruits that are best picked when 2 to 3 inches in diameter. Fun and delicious!
Ok, I think I need to stop here before I write an entire seed catalogue! I'll cover winter squash and pumpkins in a later post, but I hope you'll try a few of these amazing summer squash that I've listed above. If you can only pick one or two, I'd go with 'Magda' and a pattypan type.

Happy Gardening!


Wednesday, March 3, 2010

Seeds vs Transplants!


March is here and it will soon be time to start planting seed. Some crops can be sown directly in the garden, while others need to be started indoors to get a jumpstart on their growth. It can be a bit confusing to a novice veggie gardener, but your best sources of information are going to be a fellow gardener, a trusted garden book (see my last post on Barbara Pleasant's new book - I love love love it!) or the seed pack itself. Even the seed catalogue can offer planting tips, so when you are ordering your seed, read carefully.

Most heat loving crops need to be started indoors. These include tomatoes, peppers, eggplant, basil, cucumbers, squash, pumpkins and melons. Tomatoes, peppers, eggplant and basil will need 8 to 10 weeks of growth before they’re ready for the garden, while cucumbers, squash, pumpkins and melons will need only about 4 weeks.

Certain cold weather crops, such as broccoli, cauliflower, Brussels sprouts, cabbage and leeks (see earlier posts on growing leeks - a low maintenance gourmet crop) can also be started indoors. If grown directly from seed in the garden, I have found that the harvest is much less than if I give them 6 to 8 weeks indoors first.

Root vegetables and quick growing crops such as radishes, beets, carrots, lettuce, spinach, Swiss chard, peas, beans, corn and most salad greens can be started directly in the garden. Their planting date will depend on their cold tolerance. For example, cool season crops can be planted outdoors about 4 to 6 weeks before the last frost (here, around April 15 to May 1). These include broccoli and cabbage transplants, onion sets, spinach, arugula, peas, radishes and lettuce. If you're worried about frost, toss a floating row cover over the newly planted seeds or seedlings.

A few weeks later in mid-May, plant carrots, beets, parsnips and seed potatoes directly in the garden. The first week in June, plant beans and soybeans. Around June 10th, it should be safe to put in your tomato, pepper, eggplant, pumpkin, cucumber, melon and squash transplants. Also sow corn seed at this time.

The question remains – why bother growing your own transplants, when you can pop down to your local greenhouse and just buy them? I actually do both. We have some exceptional greenhouses in the Maritimes, and I often buy transplants from them. However, certain types of vegetables, including many heirlooms, are not always grown at greenhouses. They are only available from seed catalogues and if you want Sungold tomatoes or Lemon cucumbers, you’re going to have to grow them yourself (and you’ll be glad you did!)

To start your seeds indoors, you’ll need a sunny window or a florescent light fixture (I use 4-foot long shop fixtures from a building supply store). You’ll also need containers and some potting soil. For the most efficient use of space, I grow my transplants in inexpensive cell packs, which are placed in trays. I buy my potting soil in large cubes from a local store - it's much less expensive than buying it in 30 L bags. Whatever isn't used for seeds, can later be used for my window boxes and containers.

Once your seeds are planted and labeled, cover the trays in plastic wrap until the seeds start to germinate. This will keep the humidity levels high. Remove the plastic wrap immediately upon germination to allow for good air circulation. I also keep an oscillating fan in the same room to keep the air flowing, which is key to preventing the dreaded 'damping off'! Just don’t aim it directly at your seedlings.

Keep the lights on for about 16 hours every day and feed every two weeks with an organic liquid fertilizer. If using a florescent light fixture, keep adjusting it so that your growing seedlings are always no further than three inches from the light.

A week before transplanting in the garden, begin to harden off your seedlings. Take the trays outdoors and place them in a shaded spot. Bring them inside at night and put them out again the next day. Gradually work them into the sun and start leaving the trays out if there is no risk of frost. After a week, they should be ready for the garden.

Happy Gardening!

Tuesday, March 2, 2010

New Book by Barbara Pleasant!

So far, the 2010 gardening season is off to a great start - I just picked up a copy of Barbara Pleasant's new book, Starter Vegetable Gardens (Storey Publishing, 2010)! I am a huge fan of Barbara's, whose other books include The Complete Houseplant Survival Manual and The Complete Compost Gardening Guide (a particular favourite!). She's also a frequent guest on my radio show, always sharing fun gardening tidbits with my listeners.

For anyone contemplating starting an organic veggie garden this year - or expanding their current plantings, this is the book for you! It's packed full of useful info and colour photographs, as well as 24 no-fail plans. From bag gardening to bountiful borders to family food factories, Barbara details easy and fun ways to 'grow your own'.

Happy Gardening!

Pretty Much Picasso Supertunia!

I'm just putting together a presentation on Cutting Edge Containers for the upcoming Spring Ideal Home Show in Halifax and I came across this photo that I took last summer. It's the new Supertunia 'Pretty Much Picasso' released by Proven Winners for 2010 and I thought that I would share it with you!

Last spring, they sent me a few 'preview' plants to test in my gardens. From the moment the first bloom opened, this became my new favourite container plant! I love the unique colour combination of purple-violet with lime green and I loved that it bloomed all summer long with no need to deadhead.

Since it's a trailing plant, it is ideal for containers, window boxes and edging garden beds and pathways. It has already won several awards and will be widely available this spring at garden centres and greenhouses!

Happy Gardening!


Monday, March 1, 2010

Growing Up!

Growing veggies up is a sneaky way to get more out of your space. This is perfect for a small garden, but even those with sizable plots should take advantage of vining veggies. For example, when you grow pole beans, you can expect a 1 1/2 to 3 X larger harvest than if you planted the same space with bush beans - pretty impressive, eh?

Some of my favourite crops to grow up include pole beans ('Fortex' and 'Emerite'), peas ('Super Sugar Snap'), cucumbers ('Lemon' and Beit-Alpha type cukes like 'Sultan'), gourds (snake, spinning top, speckled swan, etc), and even small fruiting melons and winter squash ('Baby Boo' pumpkins).

You do need a sturdy structure to support your vigorous vines, especially for heavier crops like gourds and small pumpkins. I use a variety of structures including bamboo teepees, A-frame trellises, garden netting and even the deer fence that surrounds our gardens.

Growing crops up also provides another opportunity for space-savvy gardeners! Generally most vining crops are at their prime in the heat of summer - the time when many salad greens begin to wither. By growing greens beneath your structures - A-frame trellises or bamboo teepees - you provide an area sheltered from the sun that is ideal for summer crops of arugula, baby spinach or leaf lettuce.

Happy Gardening!